

Fujifilm X-T1 and Fujinon XF 55-200mm R lens – 1/850 @ f/4.8 – 200mm – ISO 200
Fujifilm X-T1 and Fujinon XF 55-200mm R lens – 1/850 @ f/4.8 – 200mm – ISO 200
Today I would like to discuss some techniques that you might find useful (or maybe not). This is not going to be technical in any way so there will be no calculations or math of any sort. Now that I got that out of the way hopefully most of you will stick around and read the entire post.
Different lenses have different angles of view (remember we discussed this in a previous post), and one of the most difficult lenses to master is the wide angle lens.
Why do you say that Joe ?
Most people approach wide angle photography the same way as if they had a 50mm lens on their camera and most times they are unhappy with the resulting images. Wide angle lenses don’t really work too well when they are used in a point and shoot fashion. The angle of view is way to wide and the resulting images have no impact because everything looks so small in the photo.
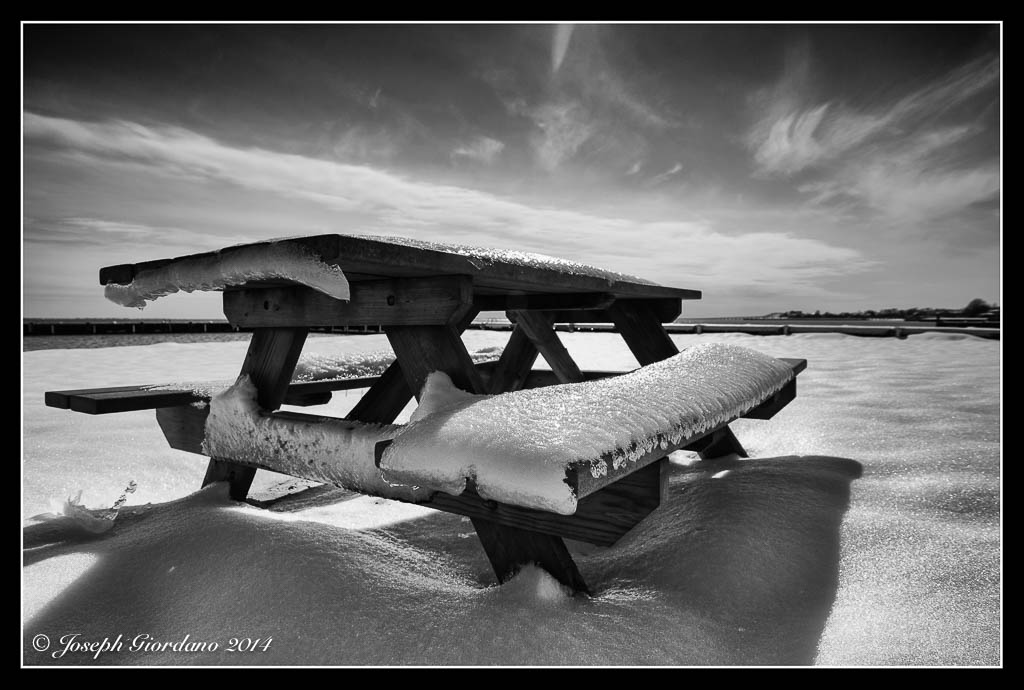
Let me show you the first example which was taken with a Tokina 12-24mm f/4 lens. I just pointed and shot the photo. All of the examples will be in black and white so I don’t distract you with colors.

As you can see in the above photo there is no impact or point of interest. Everything on the horizon is tiny and there is a picnic table covered with snow smack in the middle of this shot (don’t panic over the snow these were taken last winter). Now lets try using our feet and move around a little bit (I know zooming is easier). I would like everyone to get used to looking at a scene and moving around it looking at it from different angles. One of the first lessons I learned way back in the dark ages when I studied photography was to photograph one object from every angle I could think of. Now lets take a look at the next example which was taken with the same lens.
What do you think ? This photo has a lot more impact and all I did was take a few steps forward and use a slightly lower shooting angle. When shooting with wide angle lenses it is always good to have an object in the foreground being the depth of field is so great. Lets take a look at another example with The Tokina 12-24mm lens.

I guess this photo would work for a casual snapshot but there is really no point of interest or impact from this angle. Yes its sharp and the clouds are nice but thats about it. Now lets see what happens when we take a couple of steps to the left toward the rocks.
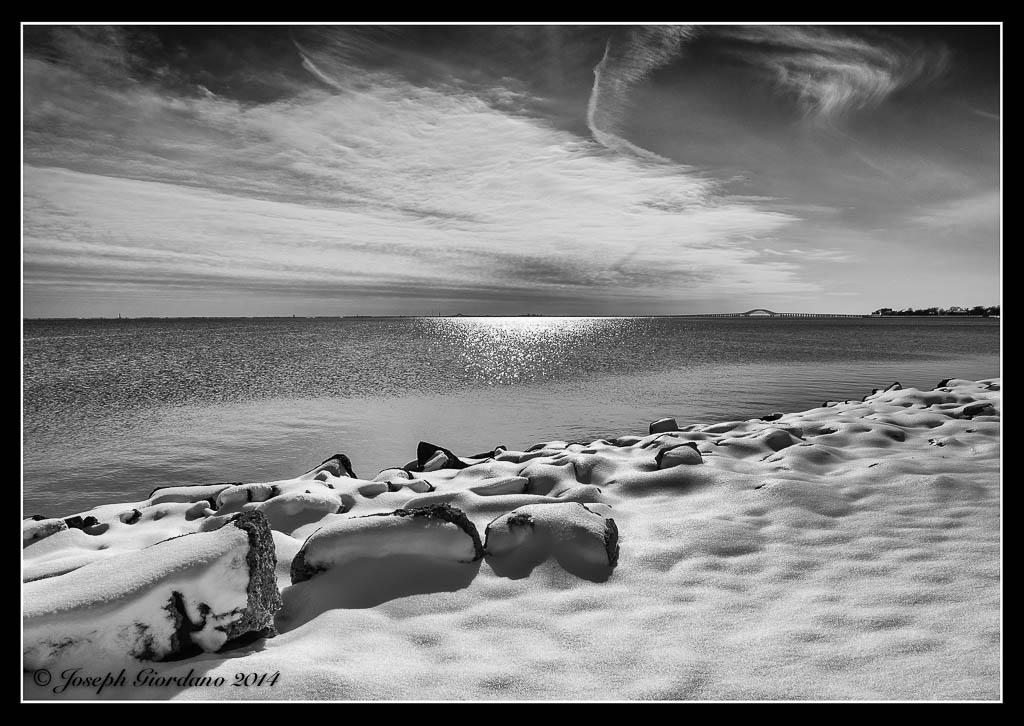
Notice the three large rocks to the lower left. They are the same rocks as the previous image so all I did was move a little bit to the left and used the rocks to sort of anchor the image or add a little more impact.
If you will take the time to approach common objects and use about 10 minutes of your time to move around them and take photos from all different angles and varying heights I will guarantee your image will improve. Next time you go out shooting try it. I bet the first image you take won’t be the keeper after you see the same object from different angles.
Lets try another example this time using a Tamron 17-50mm f/2.8 lens.
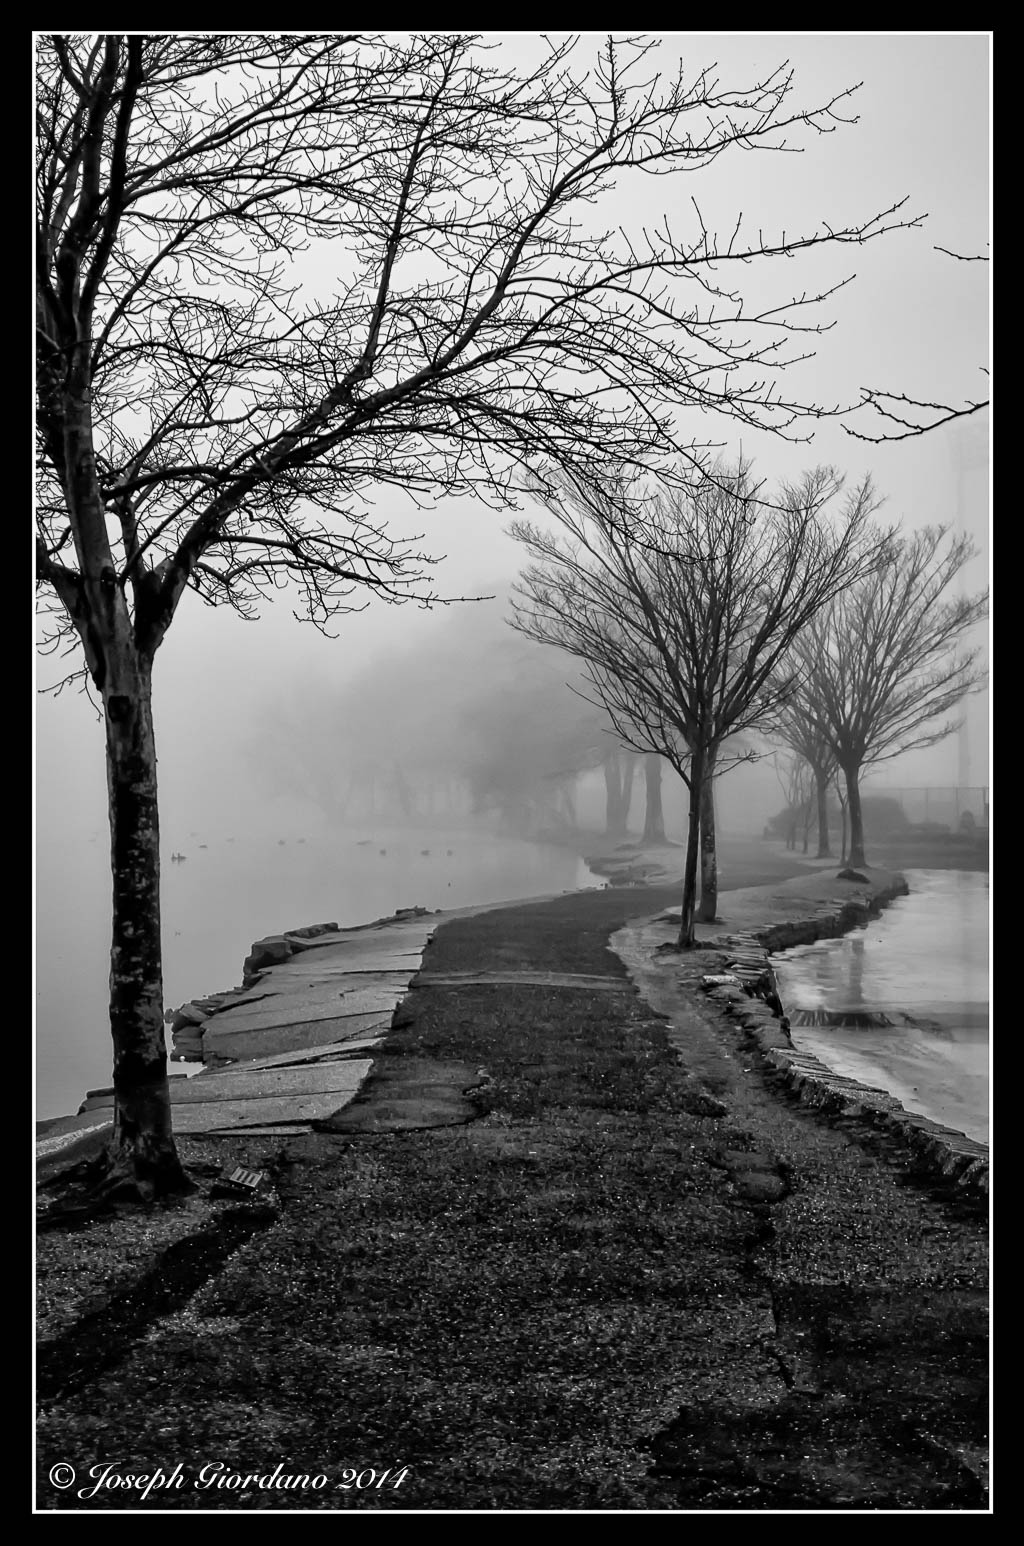
This photo was taken on a foggy morning at a local park. I used a lower angle and I thought this image would be the keeper. After taking various images of the same scene from different angles and distances I liked the image below.
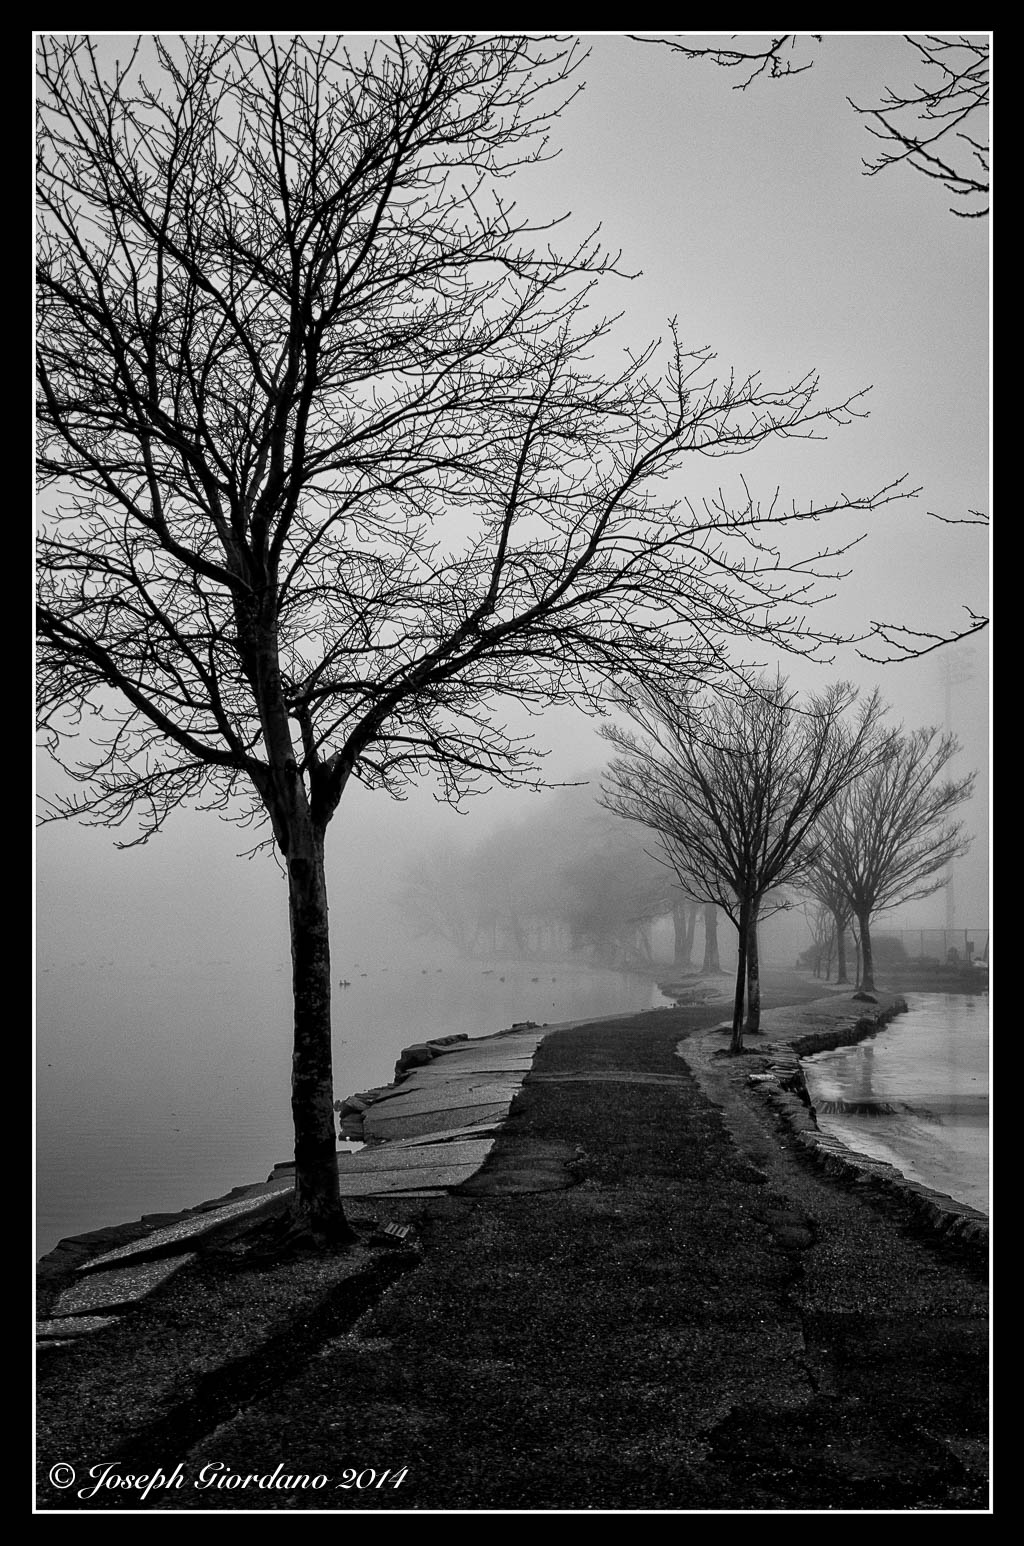
In this scene I moved back a little and stood on a large rock to get a higher angle. To my eyes this is a little more like I saw that day before looking through the viewfinder. The flow of the trees through the scene look a little smoother to me also.
Sometimes getting a better shot has nothing to do with moving around. In this example I will use the same lens and shoot the scene in landscape mode (not the camera setting but the orientation). Lets take a look.
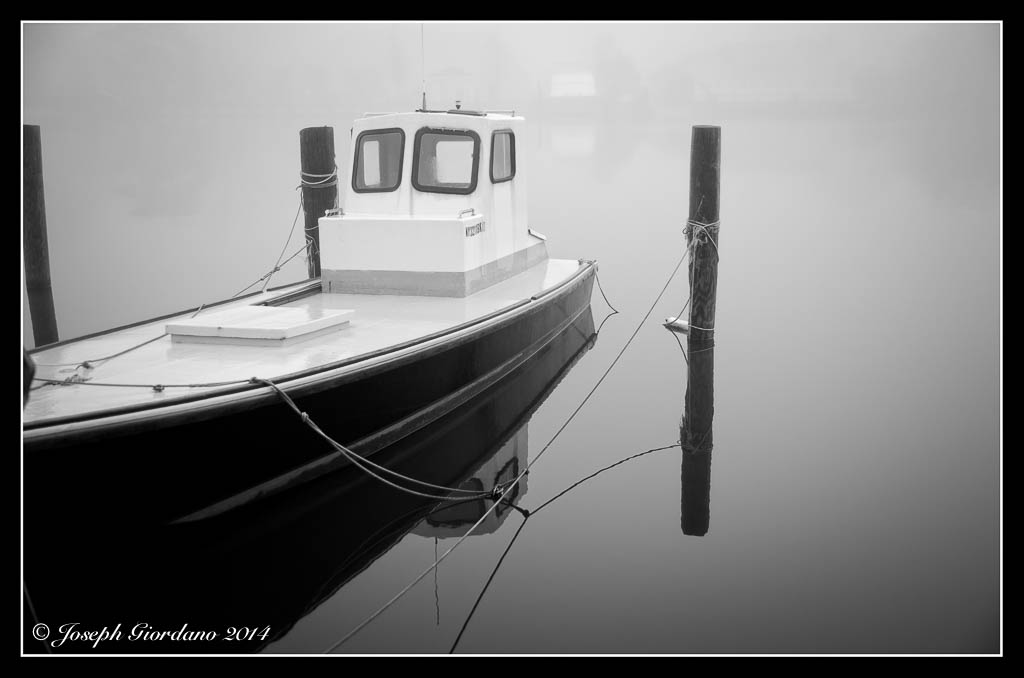
There is nothing of interest in this photo it’s just too busy. Now lets take the camera and change the orientation to portrait (turning the camera sideways).
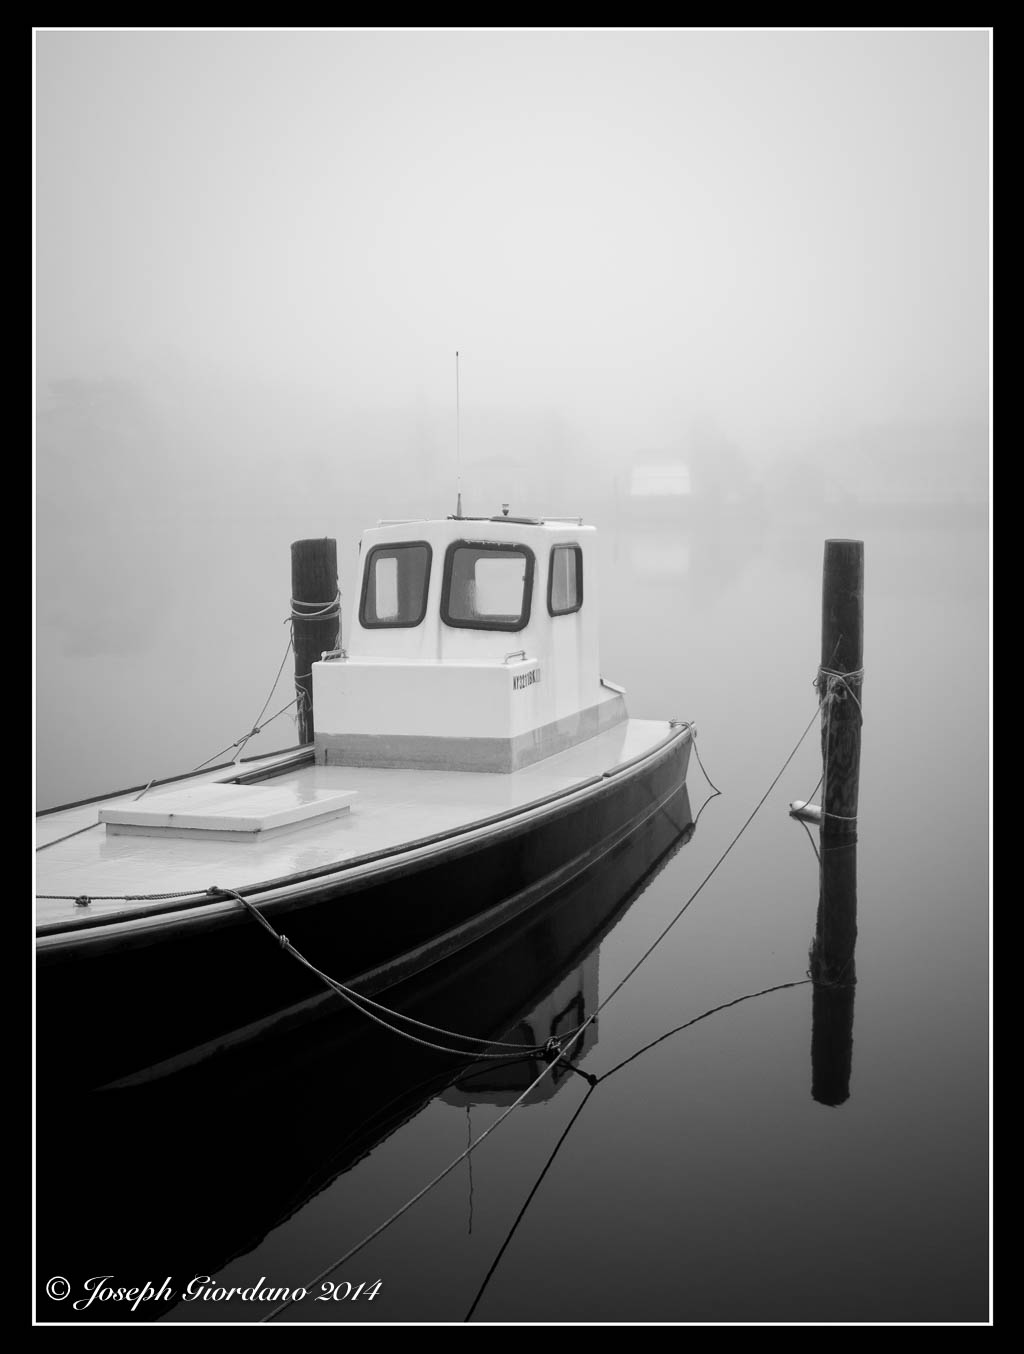
Thats better, all of a sudden by just changing the orientation of the camera the image improves. Its less busy and the composition falls into place. Now the boat and docking poles become the points of interest. The image was improved greatly just by turning the camera 90 degrees and I didn’t even have to move my feet :)
So whats the moral of the story Joe ?
The moral of the story is don’t stand still and use your zoom to vary your images. Take the time to move around your subject and shoot it from all different angles. I really think you will be very surprised at the results you get with your images.

Nikon D610 and Nikkor 180mm AF-D IF-ED f/2.8 lens – 1/160 @ f/5.6 – ISO 100
I could always tell when my wife has a new addition to the “Honey-do” list :)
In this post I would like to discuss a couple of tools a photo bug should have in their arsenal and also time exposures. First you should have a tripod, and I mean a good tripod not a cheap one. If you try to save money on a tripod you are going to end up screwing yourself. My way of checking to see if a tripod is good enough is putting the biggest lens on my camera and extending the tripod fully to its maximum height. If there is even the slightest movement when I touch the camera I look for something more sturdy. I also look for tripods that come up to eye level with the center column down. The center column is a weak link on many tripods and I find it best not to use them extended. Really good tripods and heads are expensive, and there is a reason for this. They hold your camera steady and cheaper ones don’t. I use a Manfrotto Carbon Fiber 055CXPRO3 with a Kirk BH-3 Ballhead and Arca-Swiss style quick release. I am not suggesting everyone go out and buy a carbon fiber tripod because aluminum tripods will work just fine. I bought a carbon fiber tripod because they are lighter than aluminum and I have a bad back.
The next thing you should have is a neutral density filter. A lot of new cameras have a top shutter speed of 1/4000 of a second. This is fine for stopping action but if you wanted to take a portrait of someone with an open aperture of lets say f/2.0 on a bright day it’s just not going to happen. At 1/4000 and f/2.0 you will probably overexpose your image so a neutral density filter would come in handy for this type of situation. A neutral density filter cuts the amount of light down coming through the lens and are available in different densities.
Another handy thing you should have is a remote release for your cameras shutter. There are various kinds wireless, wired and old school cable releases and range in price from about 19 dollars to over 100.
Why am I telling you all of this?
Because if you ever want to do night or low light photography you are probably not going to be able to hand hold your camera and will need a tripod and a remote release. Also one of the things I want to talk about is time exposures today. These are impossible to do without some basic tools. Below is a photo of some of the tools I use for time exposures and excuse my photo it’s a quick shot from my iPhone.

Please note if you buy a tripod and head (yes you have to buy them separately) that is equipped with a Arca-Swiss style quick release you will have to buy a compatible plate for each of your cameras. Also note that my cable release is of the $20 variety. My Fuji cameras are equipped with a threaded shutter button just like the old 35mm cameras so I can use a standard cable release. If I were shooting with my Nikon I would use a wired remote. Please take note of the 9 stop neutral density (lets refer to them as ND filters) filter or what some photographers call “black glass”. This type of filter is a must have for long time exposures. Actually I have a 10 stop B+W filter on order because a 9 stop is just not enough.
I like to do time exposures with my Fuji mirror less cameras for two reasons. The first is they mirror less meaning there is no mirror or optical pentaprism so I don’t have to block the light coming in from the viewfinder eyepiece (if you have a optical pentaprism camera like most DSLR’s you have to prevent light from coming in the eyepiece of it will affect your exposure in ways that are not to pleasant). All of the Fuji’s I own are equipped with electronic viewfinders and that eliminates the need to block extraneous light from entering the camera. If I used my Nikon I would have to bring the eyepiece cover with me and its just one more step. The second reason I like using the Fuji’s is the camera will auto focus with the 9 stop ND filter installed (I don’t have to remember to focus first set the camera to manual focus then install the filter).
Okay so enough with the equipment lets show some examples.
In the first example I want to show you a standard exposure using a Fuji X-E2 with a Fuji 18mm f/2.0 lens without a ND filter. The exposure was 1/15 @ f/16 ISO 100.

Now lets install the 9 stop ND filter and use an exposure of 28 seconds at f/16 and see what happens.

Look at what happened while the shutter was open for 28 seconds. The waves and ripples in the water smoothed out and created a blurry dreamy type effect with the water. Are you starting to see how useful a sturdy tripod is ? A cheaper tripod would not have been able to hold the camera steady for 28 seconds.
Lets try this from another angle. Also notice that this technique works best when there is a stationary object in the photo with the moving water.
This photo was taken at 1/20 @ f/16 without any ND filter. Lets try the next shot with the ND filter.

This exposure was 28 seconds @ f/16 with a 9 stop ND filter installed. I like doing time exposures in black and white because depending on the length of time the shutter is open you can get some fairly strange color shifts (nothing that can’t be fixed if shooting raw). Below is a color photo of a 20 second time exposure @f/16.

These photos are just quick examples done for this article of what can be done with ND filters, tripods and a little imagination. They were not intended to be of any artistic value. Can you imagine a coastline with some big boulders sticking out of the water and a dramatic sky. Put a ND filter on your lens and your camera on a tripod and turn that scene into a piece of fine art by smoothing out the crashing surf and the clouds moving in the sky. All it takes is a little experimenting and a few photographic tools.
I almost forgot to mention that if you are in doubt about what exposure to use after installing a ND filter there is a handy little app for the iPhone called “Long Exposure” (I’m sure they have it for Android also) and its free. All you have to do is enter the exposure information from your camera without the ND filter installed, tell the app how many stops the ND filter is and it will calculate the correct time for your shutter speed to be set at.
There are also other types of ND filters available like the Lee “Big Stopper” or the Formatt/Hi Tech 10 stop filters which come in rectangular sizes and you have to buy a special adaptor to attach them to your lens. They are more expensive and would only really pay off if you were doing a lot of time exposures.
Nikon D610 and Tamron 90mm Di SP Macro Lens – 1/320 @ f/5.6 – ISO 100
This is the sixth installment of the “You Asked For It” series and today I would like to discuss RAW files versus .jpg files or why you should shoot RAW. Sometimes I don’t practice what I preach and I shoot .jpg files with my Fuji cameras. For some reason I am just in love with the .jpg files that come out of the Fuji’s.
Okay now that I confessed to you that sometimes I cheat and shoot jpg files you are probably wondering why the hell should I listen to you Joe you’re a cheater ! To be perfectly honest I only cheat when I specifically need smaller file sizes which is one advantage to shooting .jpg (the file sizes are considerably smaller which means you can fit more images on your memory card).
So lets get down to the nitty gritty and figure out what in the world I am talking about when I say .jpg file. If you own a DSLR camera and you look in your owners manual you will find that your camera is capable of recording two or more types of files and one of those choices will be .jpg. When you set your camera to record .jpg files you are telling your camera to employ a compression scheme to the file and most likely to correct for some minor lens distortions such as pincushion distortion or chromatic aberration. You are probably saying Joe what does that mean in english. Pincushion distortion is typically found on wide angle lenses where vertical and horizontal lines seem to bow or curve. Chromatic aberration is when you magnify your image you see a color fringe around the edges if your subject.
So why should i stop shooting .jpg images if the camera corrects for all these things Joe ?
Because you have less control over your final image when you shoot .jpg images. While the camera is correcting for these distortions and busy compressing these files so you can fit more images on your memory card it is processing your files. Processed files have less latitude when you try to adjust different parameters in Lightroom or whatever program you are using to import these images into your computer.
RAW files are exactly as the name implies unprocessed uncompressed raw data. When you set your camera to shoot RAW you will notice a few things. The first will be your memory card will hold a lot less images. If your card held 1000 images of .jpg it will probably drop down to about 250 RAW images, so these files are a great deal larger than .jpg files. The next thing you will probably notice if you are someone who shoots sports and has their camera set to continuous high speed mode (I like to call these spray and shoot) is that you will be able to shoot a lot less images before your camera buffer fills. Once again in plain English your camera buffer holds the images until they can be written to your memory card. If you are a sports photographer who holds the shutter button down to have the camera continually fire to record a sequence of shots your camera will fill its buffer faster with RAW files (because they are larger) and when the buffer fills your camera will slow down until it clears the buffer enough for more shots to be held in it. In plainer english if you shoot .jpg files and your camera had a buffer capacity of lets say 25 continuous shots before slowing down you might get 10 shots with your camera set to RAW.
So enough talk and lets get some examples. What I am going to show you is a couple of examples of images that I have purposely under exposed by four stops. Please take note that all of these images will say .jpg because when I export images from Lightroom I have it set to convert them into .jpgs but please be assured that some of these files were RAW before being converted.

This file is from my Nikon D610 and was underexposed intentionally. My camera has dual SD card slots so it is simple to shoot Raw on one card and .jpg on the other card simultaneously. Most cameras with single card slots can do this also but RAW and .jpg images will be recorded on the same card.
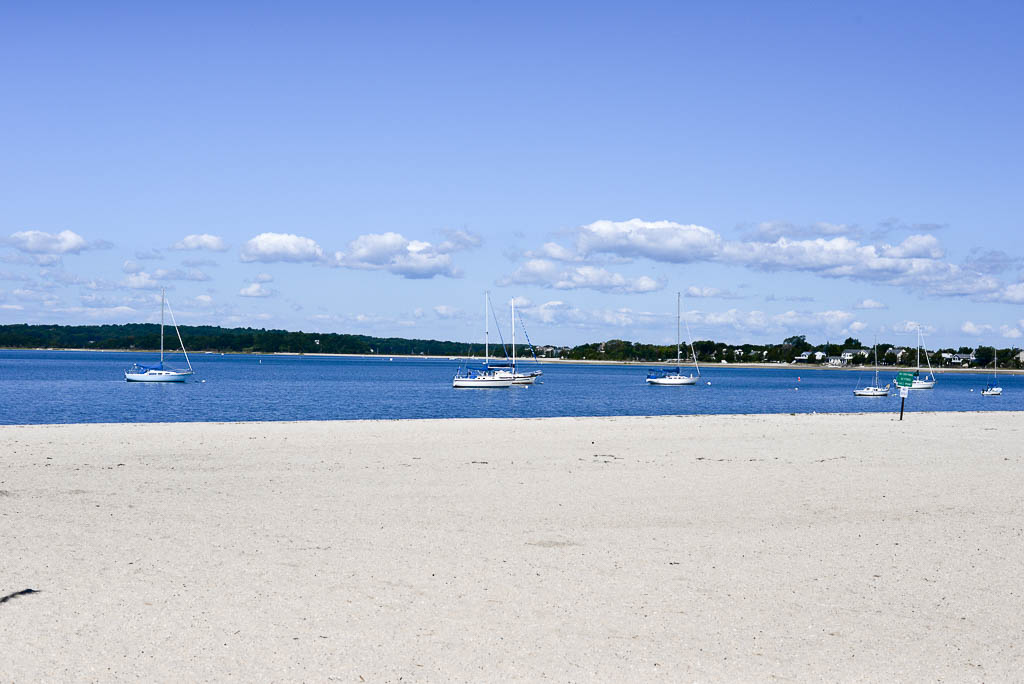
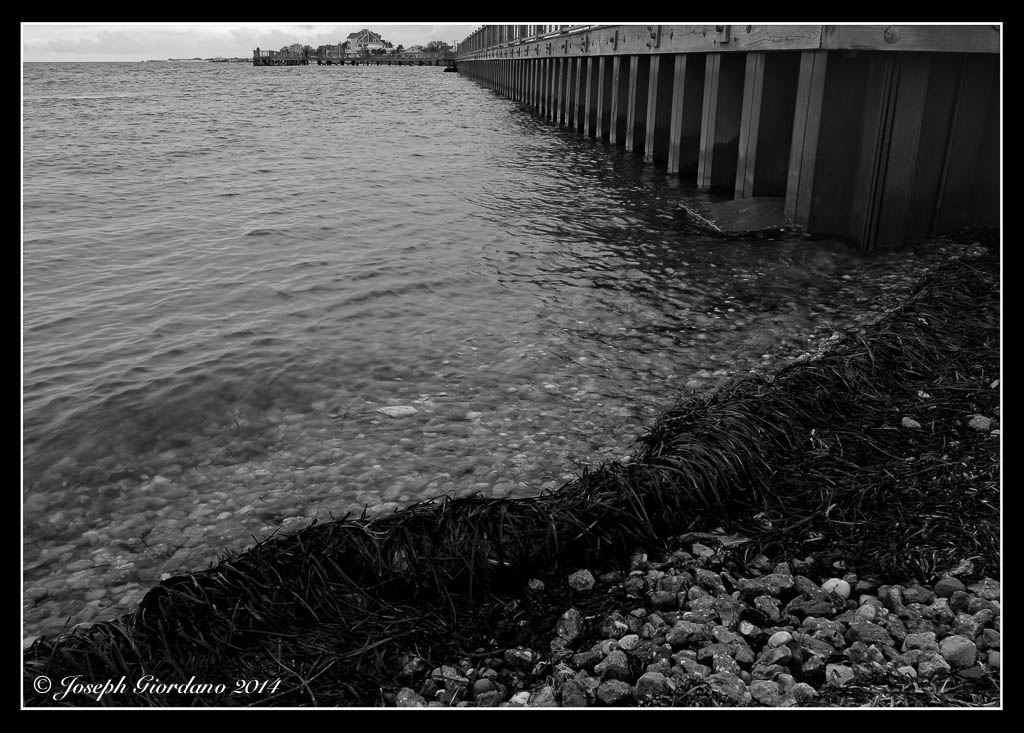
This is a .jpg file as shot in camera and was adjusted in Lightroom to bring it back to the correct exposure. No other corrections were applied such as color tint or anything other than exposure. Notice how the colors just are not quite correct and all the detail in the sand is lost. I want you to take notice of color of the boat on the left and the trees in the background. This photo might be good for emergency purposes but there is nothing in this photo that was retained that was faithful to the scene I saw. This photo probably could be adjusted a little more but its kind of like when you make a mistake painting and the more you mess with it to correct it the worse you make it. Why would you want to spend more time post processing your images if you make a mistake with your exposure just for the sake of fitting more images on your memory card. Memory cards are pretty cheap just buy a larger capacity one.
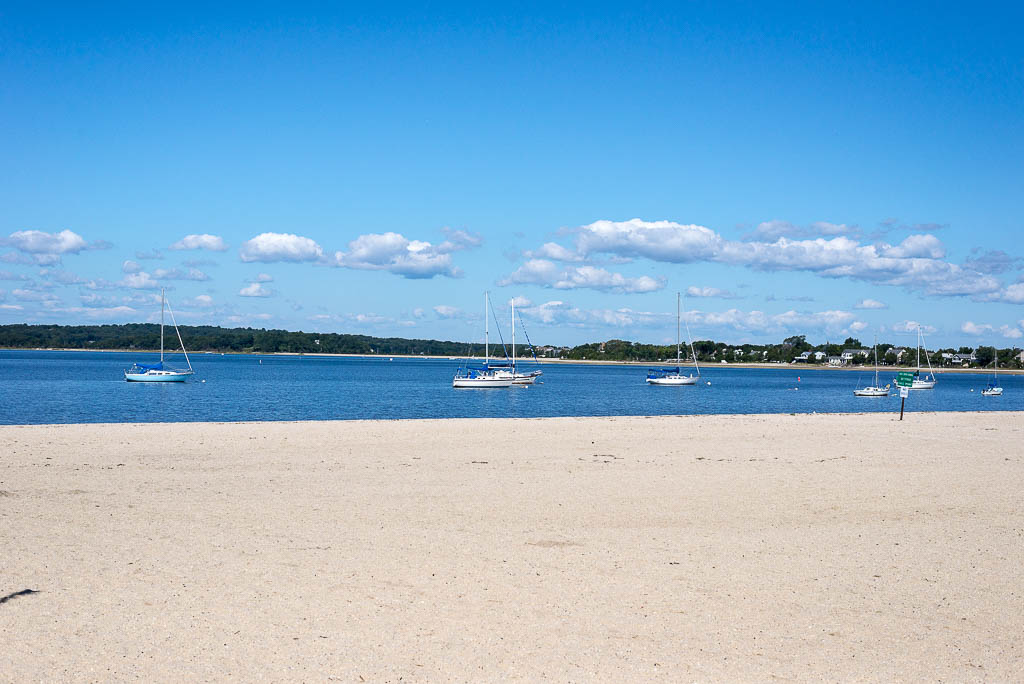
Here is the same image that was shot in RAW. No other corrections were applied such as color tint or anything other than exposure. Notice the sand is more accurate in color along with the sky. The sand retained a little more detail than the .jpg file. Also take a look at the hull of the boat on the left which is the correct shade of blue. Notice the trees in the background are green and not bluish/black like in the .jpg file.
Please go out with your camera and experiment with RAW files. Raw files can be called different things by various camera manufacturers . When I used to have my Olympus OMD E-M5 camera the RAW files had an .orf extension and on Nikon they are called .NEF. Whatever they are called you should learn to use them because they are much more flexable than .jpg files. Most people think after you take the photo your job is done but if you really want to take your work to the next level you will have to learn how to correctly post process your images. Post processing is really where a RAW file shines.
Ansel Adams was a great photographer but he was also a master of the darkroom. He would spend hours tweaking his images in the darkroom to achieve the exact look he wanted. In todays world we have the luxury of RAW files and programs like Lightroom to take the place of the darkroom.
For those who are interested here is a video of Greg Cazillo fine tuning a RAW file from a Nikon D3x 24 megapixel camera. It’s interesting how the image transforms from the out of camera shot to the finished product. I hope you will take the time to watch it.

Fujifilm X-E2 and Fujinon XF 27mm 2.8 Pancake Lens – 1/640 @ f/4.0 – ISO 200
Nikon D610 and Nikon 50mm f/1.8 G AF-S Lens – 1/3200 @ f/1.8 – ISO 100
Please note: beginning Friday September 19th The Visual Chronicle posting schedule will change to three times weekly instead of daily. I will post photos on Tuesdays and Thursdays, and on Fridays the weekly tutorial will continue. I would like to thank all of my followers and viewers that stopped by daily for the past two years and I would love to continue posting every day but truth be told between Monochromia and The Visual Chronicle it is just taking up too much of my time. It’s time to relax a bit after all I am retired :)

