
Fujifilm X-T1 and Fujinon XF 55-200 OIS R Lens – 1/450 @ f/4.8 – 200mm – ISO 200
Fujifilm X-T1 and Fujinon XF 23mm f/1.4 R Lens – 1/3000 @ f/2.5 – ISO 200
Fujifilm X-T1 and Fujinon XF 55-200 OIS R Lens – 1/450 @ f/4.8 – 200mm – ISO 200
Fujifilm X-T1 and Fujinon XF 23mm f/1.4 R Lens – 1/3000 @ f/2.5 – ISO 200

Fujifilm X-T1 and Fujinon XF 55-200 OIS R Lens – 1/240 @ f/5.6 – 200mm – ISO 200

Fujifilm X-T1 and Fujinon XF 55-200 OIS R Lens – 1/800 @ f/4.8 – 200mm – ISO 200
Fujifilm X-T1 and Fujinon XF 60mm f/2.4 R Macro lens – 1/1200 @ f/2.8 – ISO 200

Fujifilm X-T1 and Fujinon XF 60mm f/2.4 R Macro Lens – 1/480 @ f/2.4 – ISO 200
Fujifilm X-T1 and Fujinon XF 55-200mm R OIS lens – 1/600 @ f/4.4 – 135mm – ISO 200

Fujifilm X-T1 and Fujinon XF 55-200mm R lens – 1/850 @ f/4.8 – 200mm – ISO 200
Before we get into this discussion of what color temperature is I should explain the Kelvin scale. Color temperature is rated in degrees k (k in lower case) on the Kelvin scale which was invented by Scottish scientist William Thompson (Lord Kelvin). I am not going to get into a discussion on how William Thompson arrived at this scale but if you are interested you can do a Google search on him and there is plenty of information available on the subject.
The color temperature scale will apply to all color photography but white balance is only adjustable in post processing if you shoot RAW.
What is color temperature ?

The chart provided above indicates that 5500 degrees k is daylight. Anything lower than 5500 degrees k will impart a yellow to red quality of light to your images and anything higher will impart a blue quality. If you remember in previous lessons I stated that I take a lot of images around “Golden Hour”. If you look at the Kelvin scale you will see that Sunrise/Sunset and Golden Hour are on the warm side of the scale and the quality of light is on the yellow to orange. The example below will verify how the quality of light (or color temperature) will correspond with the kelvin scale.

The above photo was taken right after sunrise and the color temperature is about 3300 degrees k. If you look at the Kelvin scale at 3300 k you will see what color light influenced the above image.
I know the above explanation is fairly basic but I think it is easy enough to understand just by looking at the chart.
Why should I worry about color temperature because the camera seems to do a good job adjusting it on its own ?
The camera does a very good job of adjusting white balance on its own and I suggest you leave it Auto white balance. I am suggesting that you shoot RAW rather than jpg files because if the camera is slightly off with its white balance choice at least you can correct it in post processing.
But my camera is always spot on and I never feel the need to adjust white balance Joe.
That might be true but you must be very lucky because sooner or later you will have to adjust white balance to achieve proper color. I will show you a couple of examples below and while the white balance is only slightly off it makes a big difference when working with a color calibrated monitor (as I am) and if you print your photos. Most people do not see white balance problems until they print their image and waste expensive photo paper.

In the above example this is a pretty straight forward image of some flowers and the camera did a pretty decent job with the white balance 4750 degrees k. Upon a closer inspection you might notice the white petals take on a bluish green tint because of the light reflected off the background foliage.

In this example I corrected the white balance by raising the color temperature in Lightroom to 5100 degrees k which is more like the scene I saw with my eyes. Even though the color temperature was only raised by 350 degrees k the white petals are more correctly displayed.
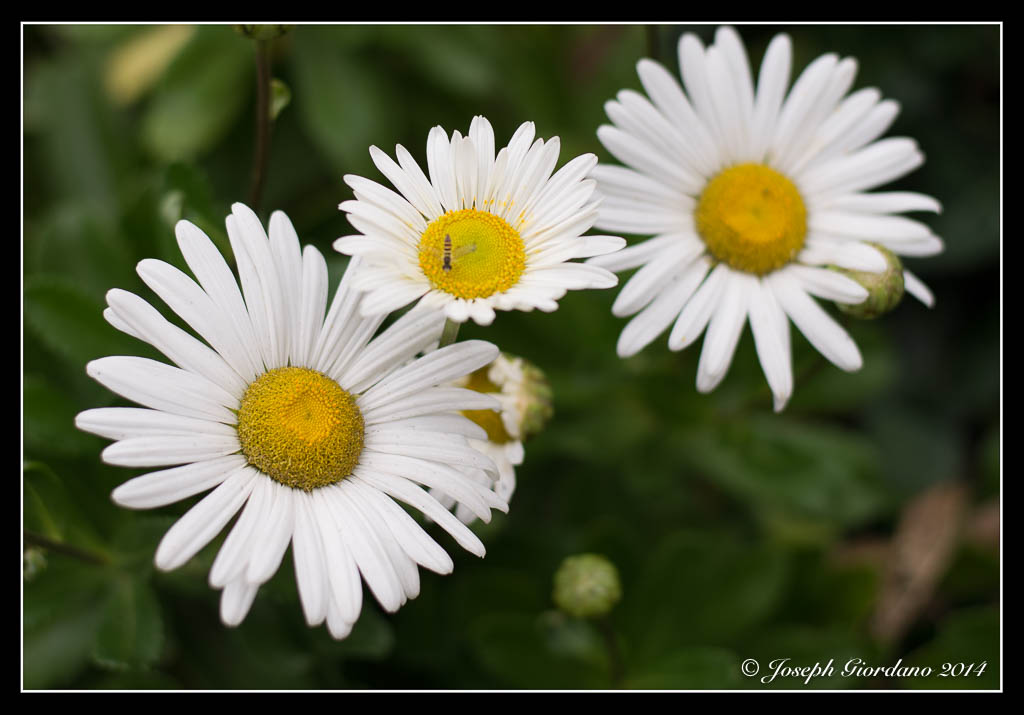
In this example I changed the color temperature to daylight in Lightroom 5500 degrees k but I think its a little too much to my liking so the second example looks more correct to me. Some of you might not even notice these changes I am making because you are using a small screen or a notebook computer but I can assure you with a 27′ monitor like the size I am using the changes are plain as day.
Let me show you a different example.

This image was taken in Niagara Falls from the Canadian side and the image looks pretty good. I didn’t like the bluish tint to the spray and the water coming over the falls. This photo was taken on Auto white balance at 4950 degrees k. Lets try to correct that water in the next image.

This is a little bit better the water is closer to the original color and the spray looks whiter. The surroundings look like mid April in Ontario (when this image was taken) before the leaves started growing on the trees. This was corrected to daylight or 5500 degrees k in Lightroom.
If you shoot RAW files you should try going back into your photo archives and try to find some that might benefit from a small white balance adjustment.

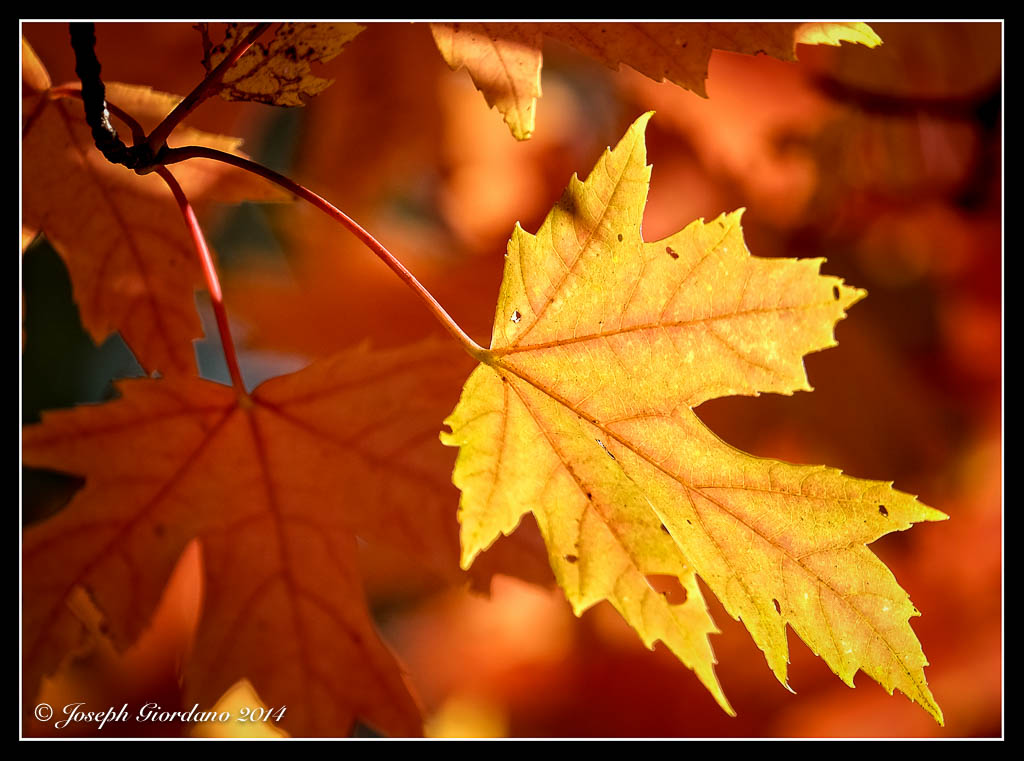
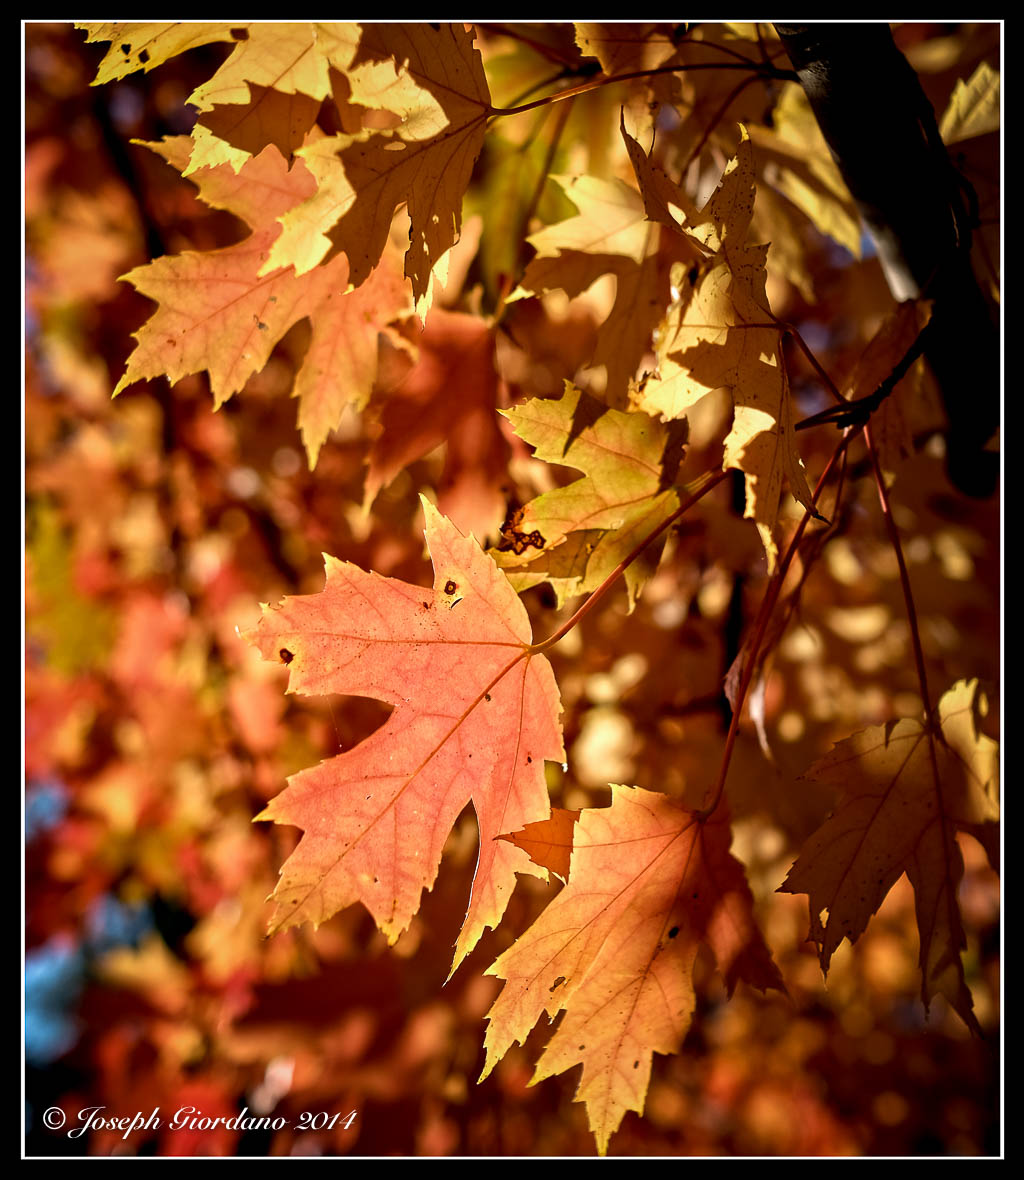
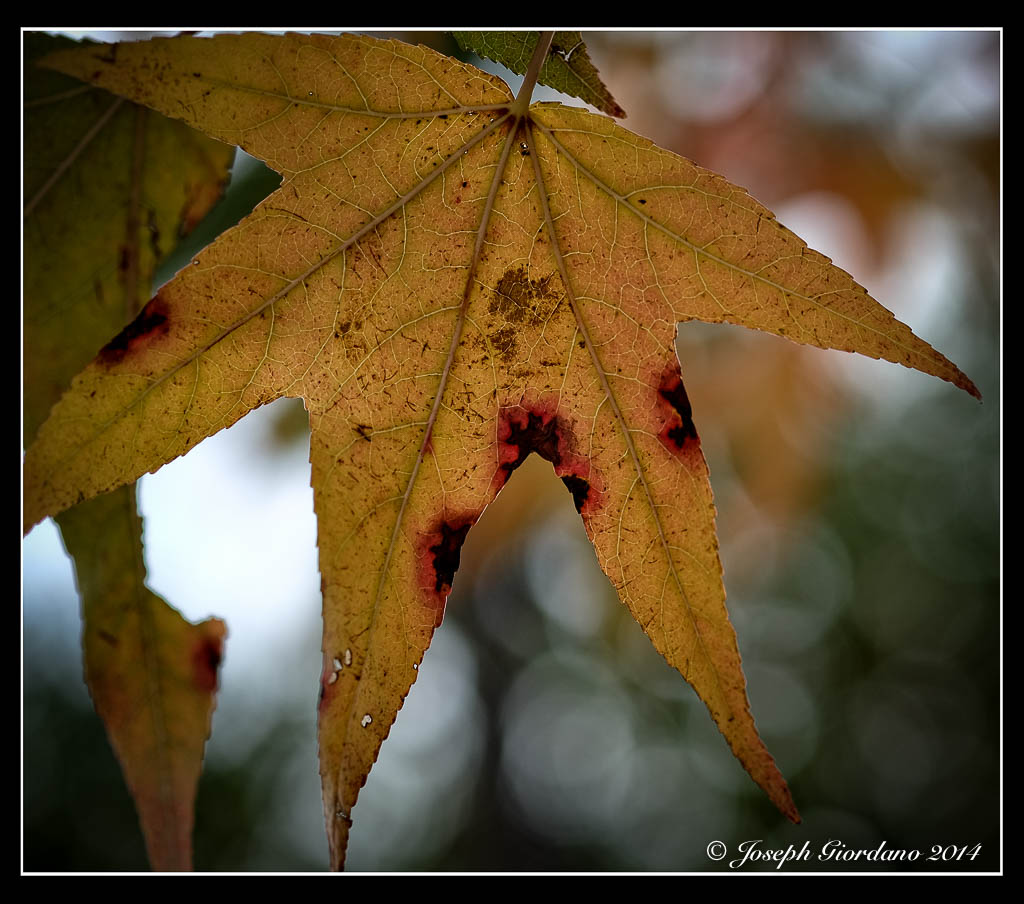
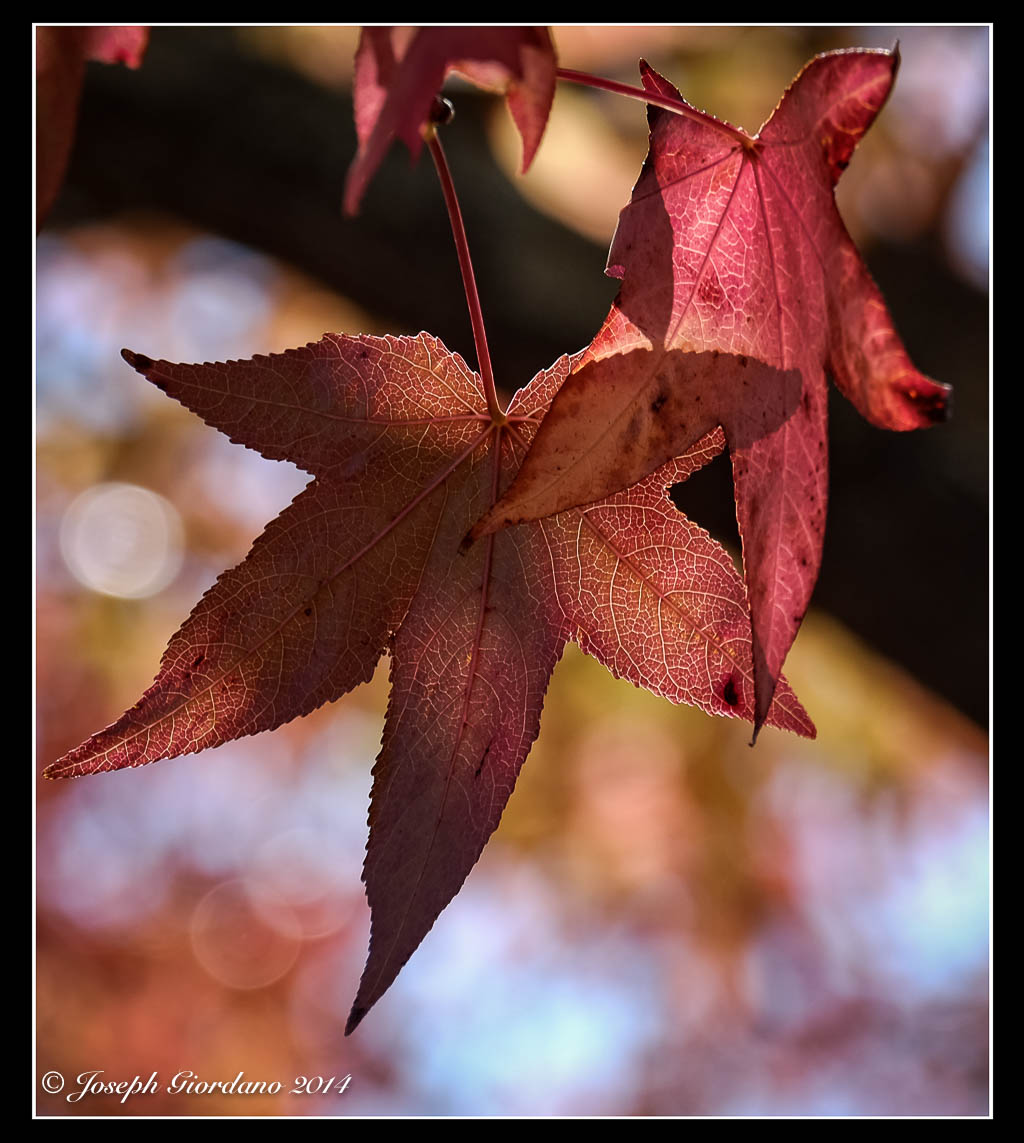
Hurry up ! This years fall colors are now debuting at a park near you :)

Nikon D610 and 50mm AF-S G f/1.8 lens – 1/2000 @ f/4.0 – ISO 100
I was looking at this shadow of a flag when the wind picked up and I snapped this image.
Today I would like to discuss some techniques that you might find useful (or maybe not). This is not going to be technical in any way so there will be no calculations or math of any sort. Now that I got that out of the way hopefully most of you will stick around and read the entire post.
Different lenses have different angles of view (remember we discussed this in a previous post), and one of the most difficult lenses to master is the wide angle lens.
Why do you say that Joe ?
Most people approach wide angle photography the same way as if they had a 50mm lens on their camera and most times they are unhappy with the resulting images. Wide angle lenses don’t really work too well when they are used in a point and shoot fashion. The angle of view is way to wide and the resulting images have no impact because everything looks so small in the photo.
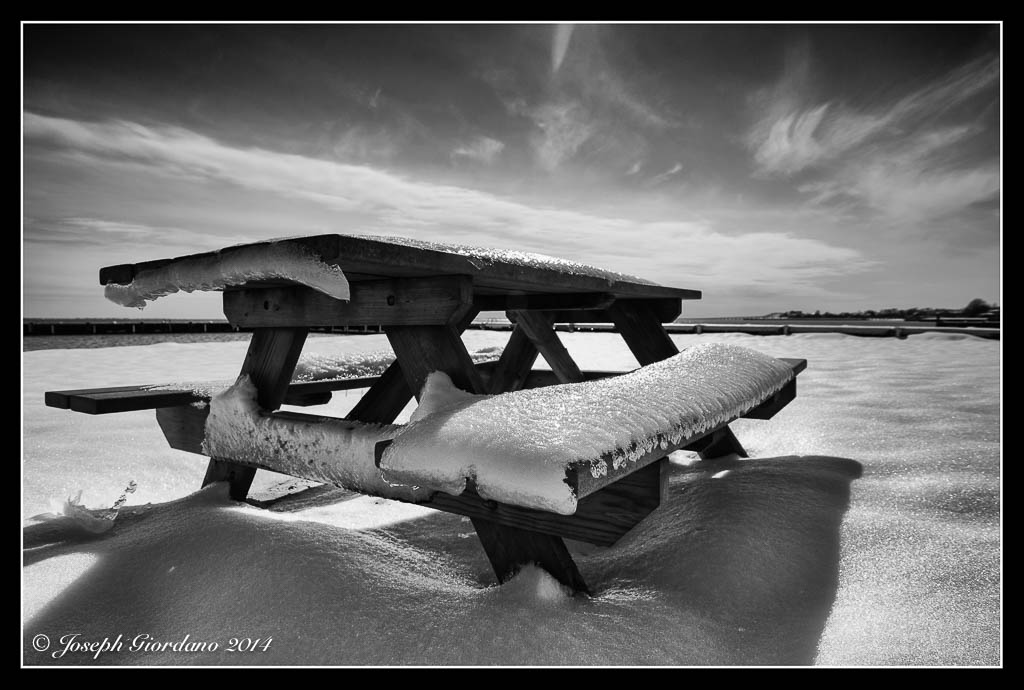
Let me show you the first example which was taken with a Tokina 12-24mm f/4 lens. I just pointed and shot the photo. All of the examples will be in black and white so I don’t distract you with colors.

As you can see in the above photo there is no impact or point of interest. Everything on the horizon is tiny and there is a picnic table covered with snow smack in the middle of this shot (don’t panic over the snow these were taken last winter). Now lets try using our feet and move around a little bit (I know zooming is easier). I would like everyone to get used to looking at a scene and moving around it looking at it from different angles. One of the first lessons I learned way back in the dark ages when I studied photography was to photograph one object from every angle I could think of. Now lets take a look at the next example which was taken with the same lens.
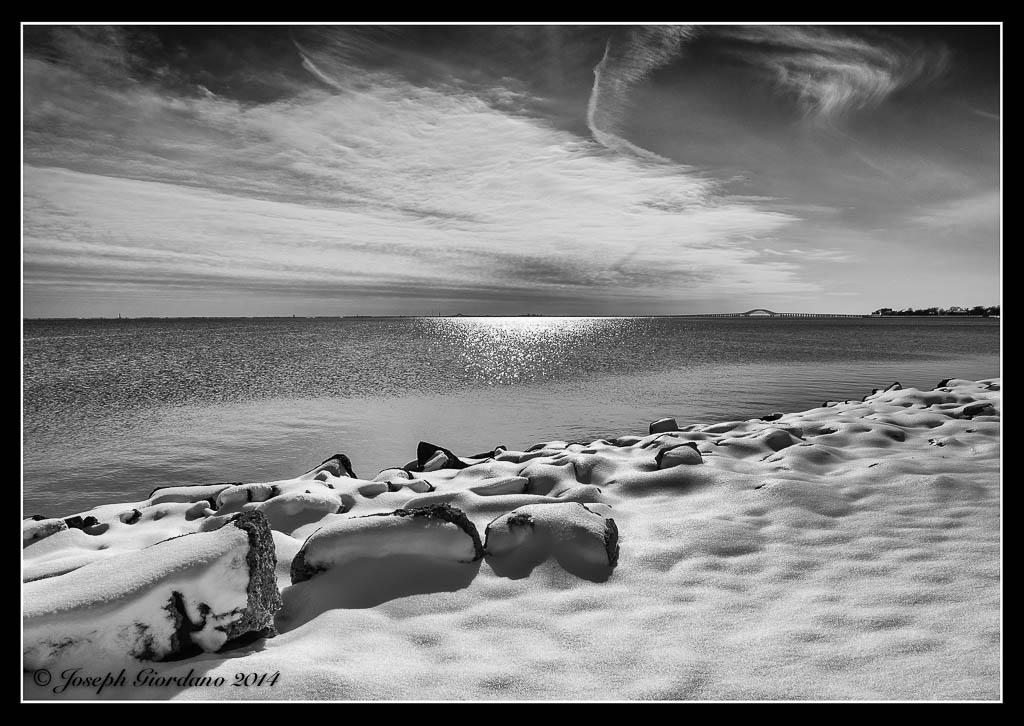
What do you think ? This photo has a lot more impact and all I did was take a few steps forward and use a slightly lower shooting angle. When shooting with wide angle lenses it is always good to have an object in the foreground being the depth of field is so great. Lets take a look at another example with The Tokina 12-24mm lens.

I guess this photo would work for a casual snapshot but there is really no point of interest or impact from this angle. Yes its sharp and the clouds are nice but thats about it. Now lets see what happens when we take a couple of steps to the left toward the rocks.
Notice the three large rocks to the lower left. They are the same rocks as the previous image so all I did was move a little bit to the left and used the rocks to sort of anchor the image or add a little more impact.
If you will take the time to approach common objects and use about 10 minutes of your time to move around them and take photos from all different angles and varying heights I will guarantee your image will improve. Next time you go out shooting try it. I bet the first image you take won’t be the keeper after you see the same object from different angles.
Lets try another example this time using a Tamron 17-50mm f/2.8 lens.
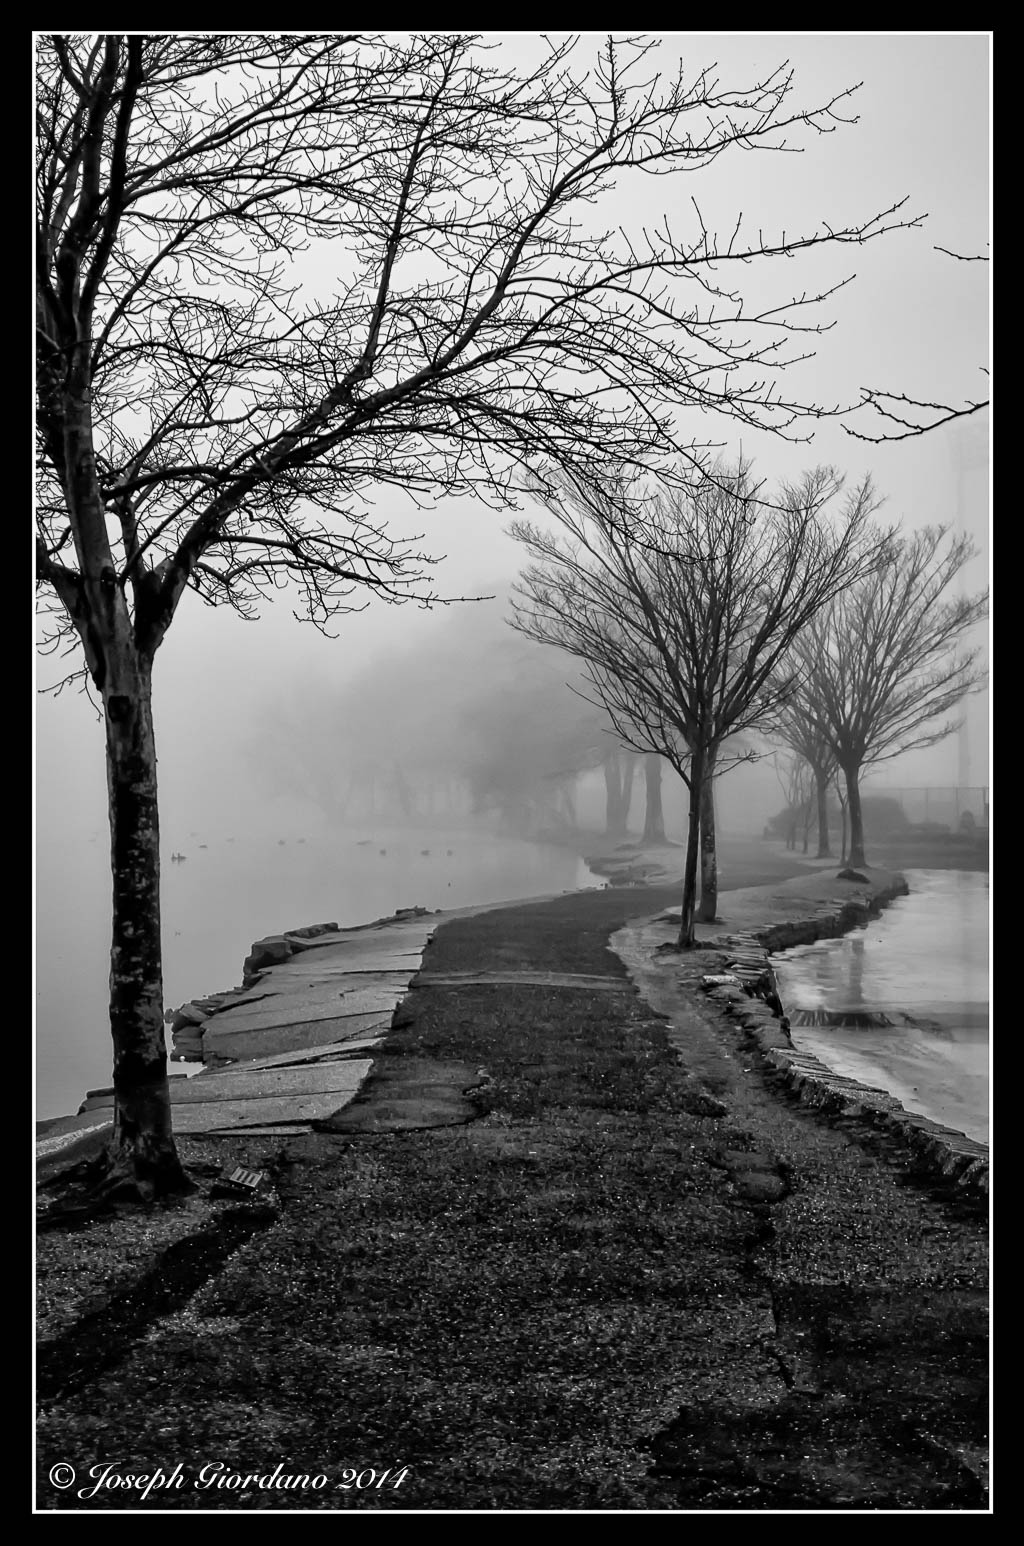
This photo was taken on a foggy morning at a local park. I used a lower angle and I thought this image would be the keeper. After taking various images of the same scene from different angles and distances I liked the image below.
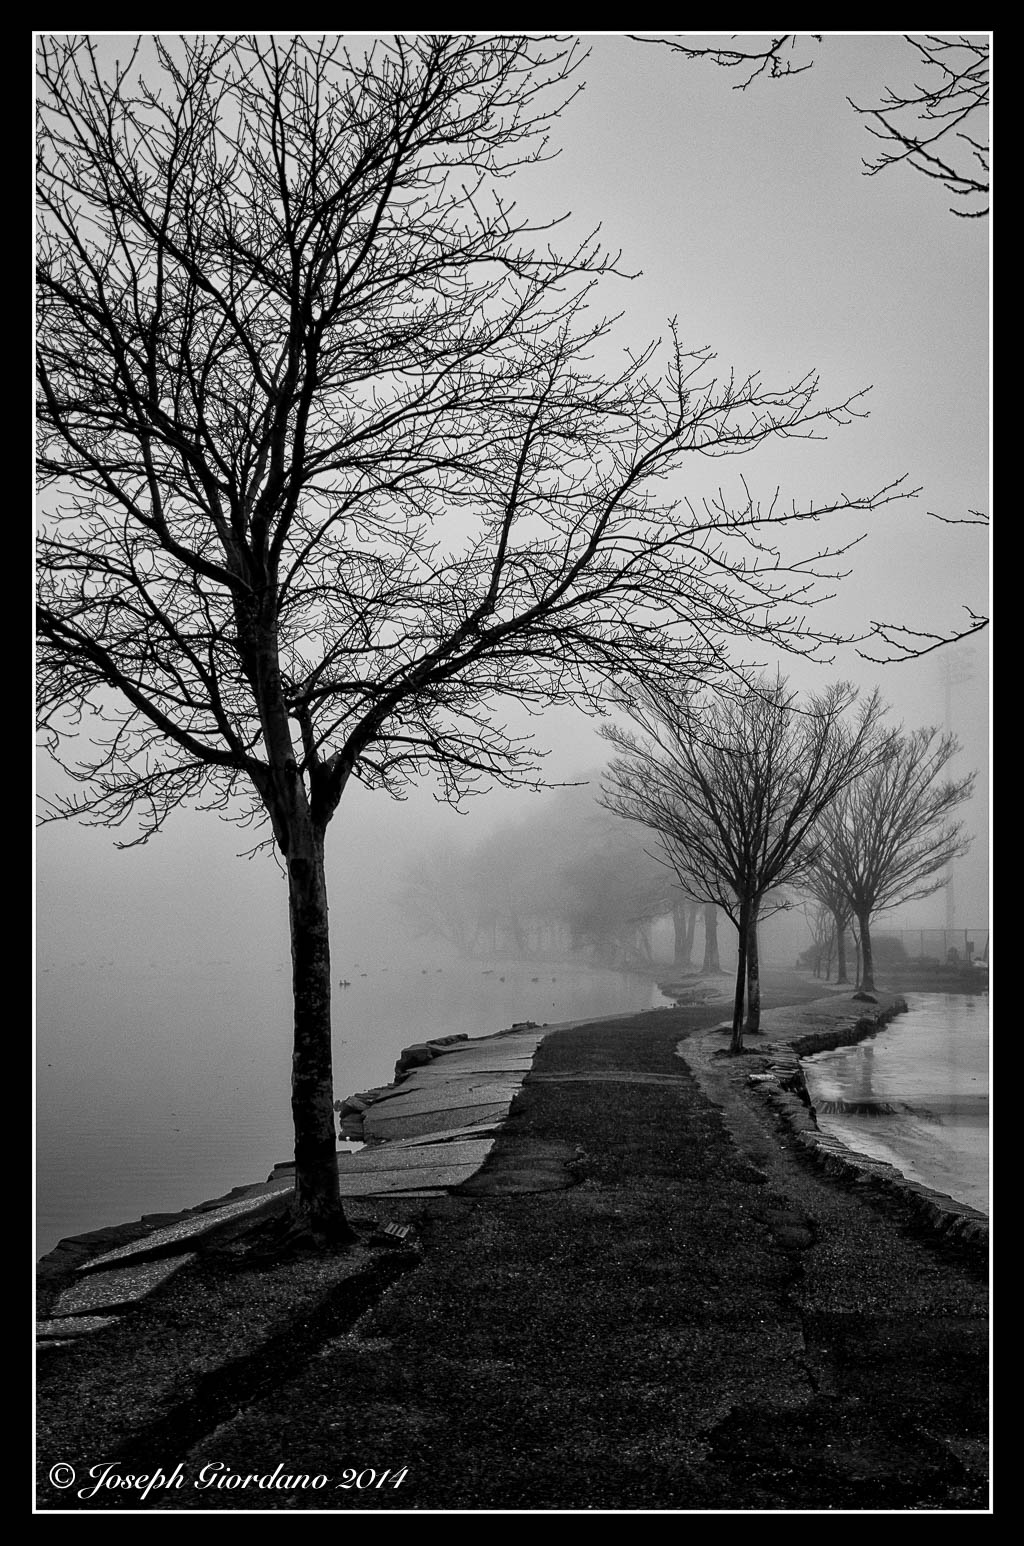
In this scene I moved back a little and stood on a large rock to get a higher angle. To my eyes this is a little more like I saw that day before looking through the viewfinder. The flow of the trees through the scene look a little smoother to me also.
Sometimes getting a better shot has nothing to do with moving around. In this example I will use the same lens and shoot the scene in landscape mode (not the camera setting but the orientation). Lets take a look.
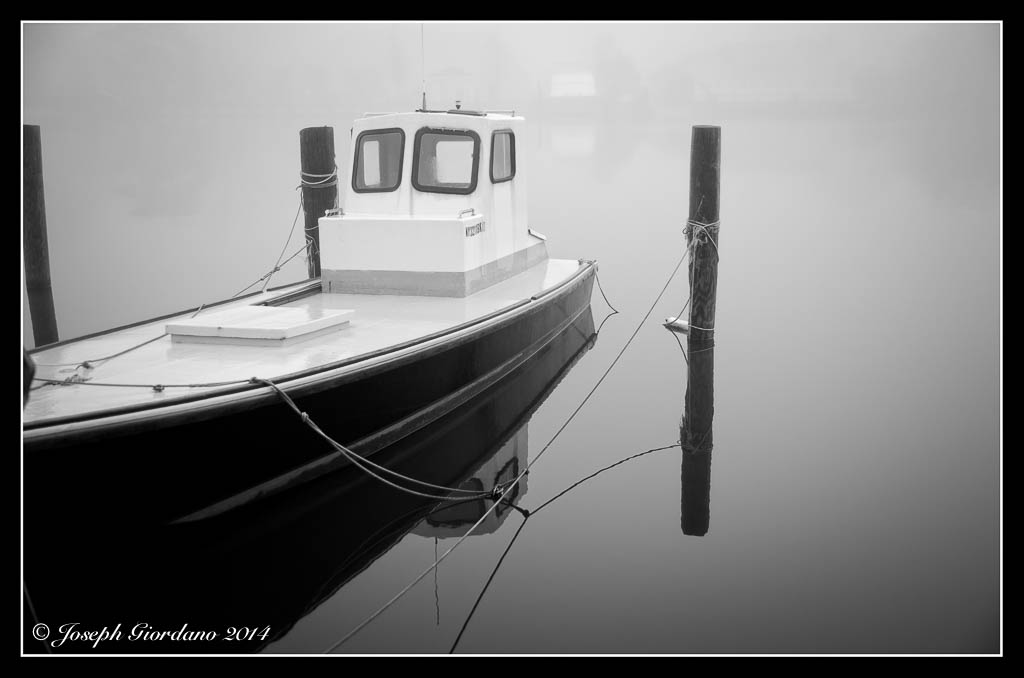
There is nothing of interest in this photo it’s just too busy. Now lets take the camera and change the orientation to portrait (turning the camera sideways).
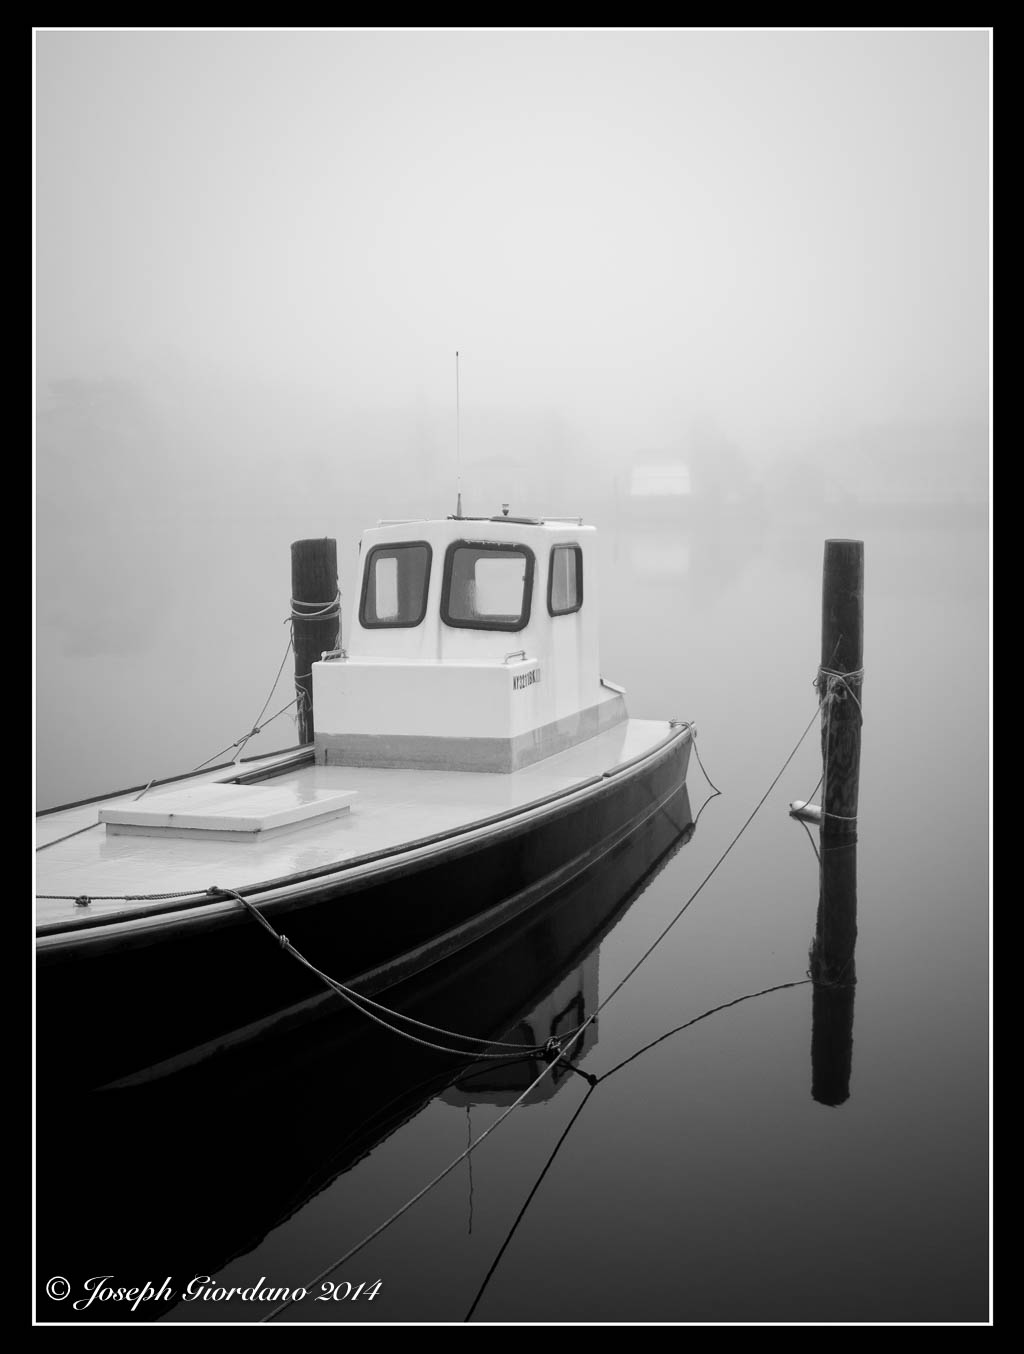
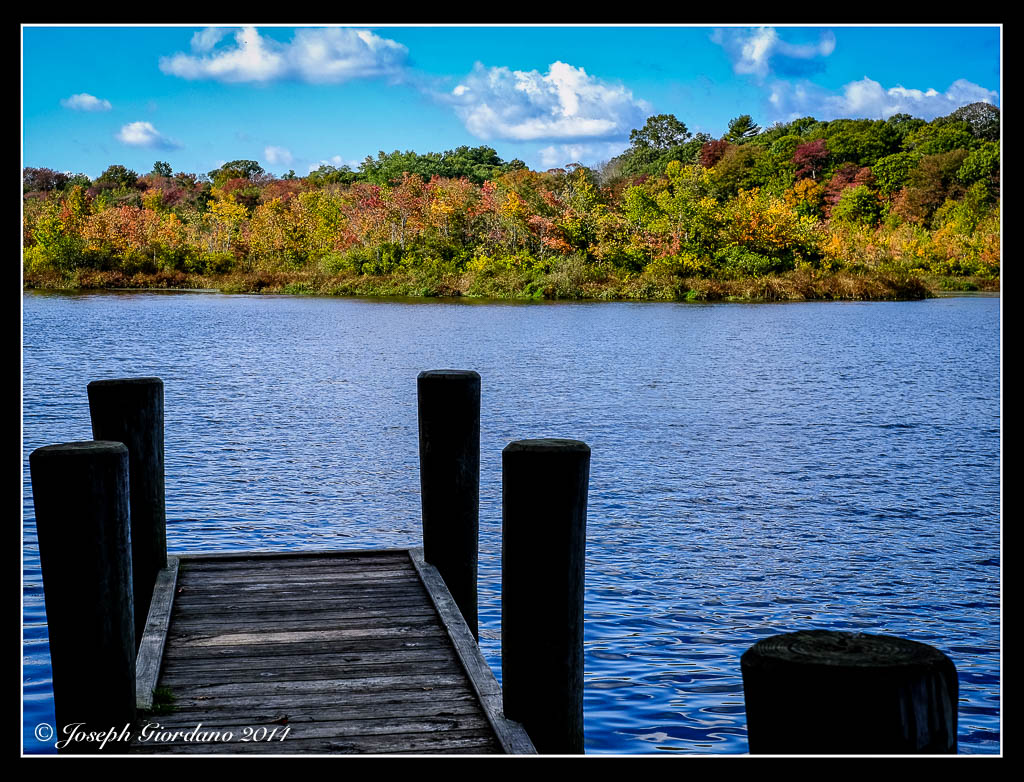
Thats better, all of a sudden by just changing the orientation of the camera the image improves. Its less busy and the composition falls into place. Now the boat and docking poles become the points of interest. The image was improved greatly just by turning the camera 90 degrees and I didn’t even have to move my feet :)
So whats the moral of the story Joe ?
The moral of the story is don’t stand still and use your zoom to vary your images. Take the time to move around your subject and shoot it from all different angles. I really think you will be very surprised at the results you get with your images.

